To avoid altering your deliverability and prevent your emails from falling into spam because of your signature, we strongly advise you to set up a custom domain.
Go to the Settings in your administration interface.
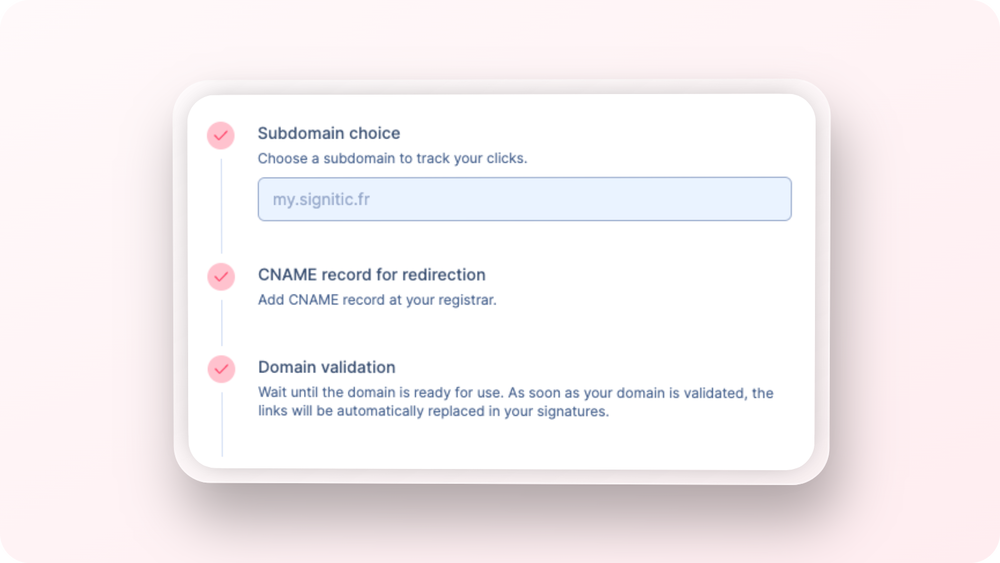
We advise you to choose as subdomain signature.mycompany.com

Once you have filled it in step 1, a small blue block will appear: this is the DNS record that you need to add on the side of your hosting service.
The way CNAME records are created varies depending on the hosting service. If in doubt, do not hesitate to ask for advice from the company concerned (OVH, AWS, Google Domains, Ionos, Gandi, etc).
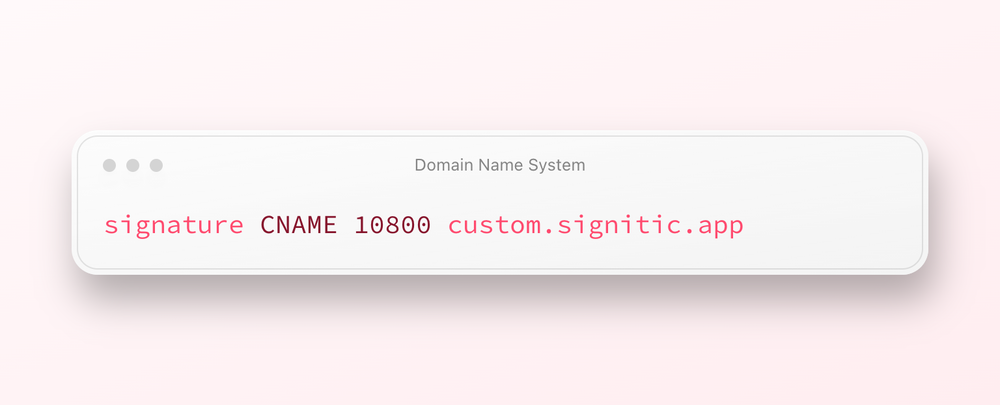
The main steps are :
Create a new DNS record (example: signature.monentreprise.fr).
Choose CNAME as record type.
Enter custom.signitic.app. in the record value.
Once the CNAME is set up, you should see the following screen when accessing your subdomain (example: https://signature.monentreprise.fr) :

As soon as the previous steps have been validated, go back to the settings in your administration interface: your subdomain has been validated!
The next time you update your signatures, the links will automatically take the form of signature.mycompany.com.
In order not to have any problem with your subdomains, Signitic has in place a daily monitoring to check that your subdomain is still active. In case of a problem you will be notified immediately.
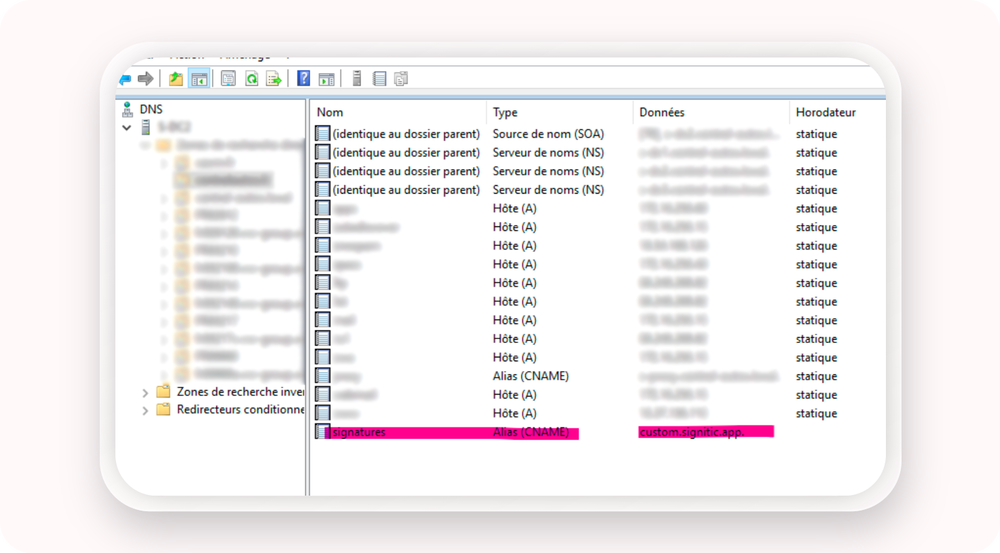
When using Windows Server, it is important to configure in the DNS Manager the external redirection of this new DNS.
(If that doesn't work, don't hesitate to write the word "Signatures" in the singular).