In order to have your email signature on your Pipedrive account, some steps are necessary.
 The user's e-mail address must be synchronized to Pipedrive, and the user must have at least one e-mail in his Inbox to see his signature appear. (Pipedrive's automatic invitation is sufficient).
 Access your Pipedrive settings
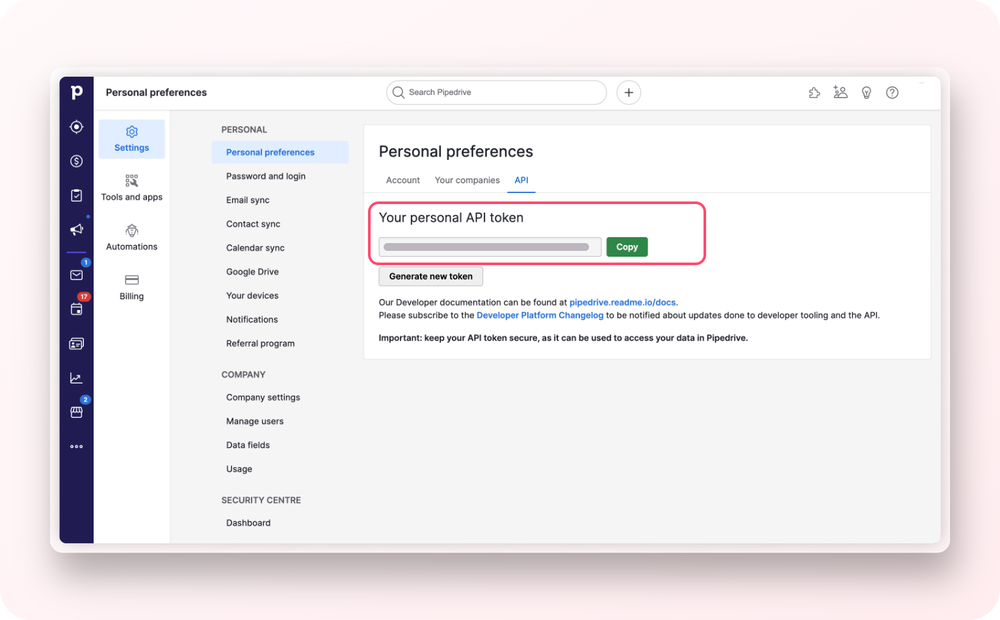
Start by logging into your Pipedrive account and accessing your settings.
Then go to the API tab of your Personal Preferences.
👉🏻 Copy your personal API token.
 Go to your connector settings
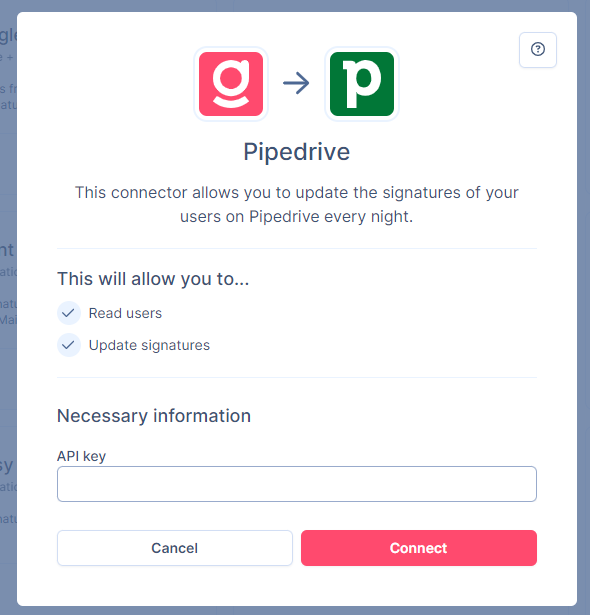
Back on Signitic, go to the Connectors settings.
Click on Pipedrive and paste your API key, then click on Connect.
 Activate signature update
As with all Destination connectors, it is important to enable signature update on the connector afterwards if you want to update the signatures right away.
To do this, click on Pipedrive in your Connectors settings.
Then click on Enable Signature Update.
 API Key
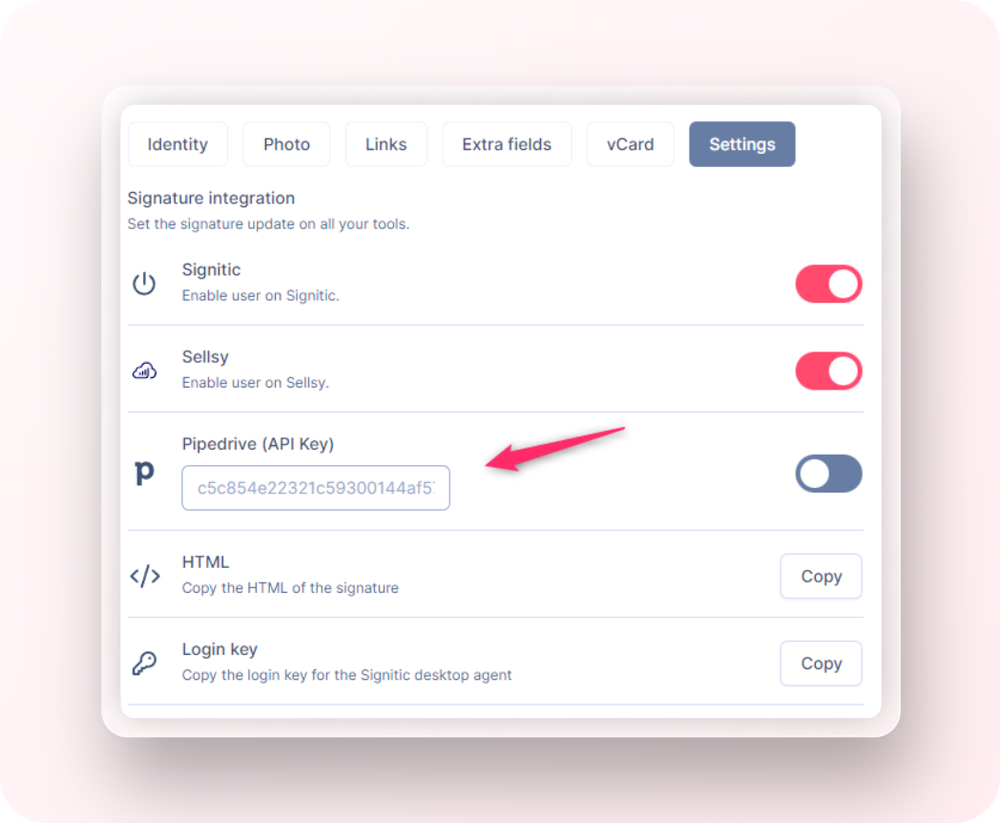
Now that the connection is established, a new field has appeared in the user page for users that can be connected to Pipedrive.
Now you have to fill in the API keys of your users. You can either fill them in yourself if you have access to the Pipedrive account of your collaborators. As soon as the key is entered, the connection between Pipedrive and the user's signature is established.
Tip: If you are not able to add the Pipedrive key on a user profile, it means that the email does not match one of your Pipedrive users.
You can update your signatures on the Syncronization Module or wait until tomorrow morning to see them updated.