In order to have your email signature on your Salesforce account, a few steps are necessary.
 Go to the Connectors settings
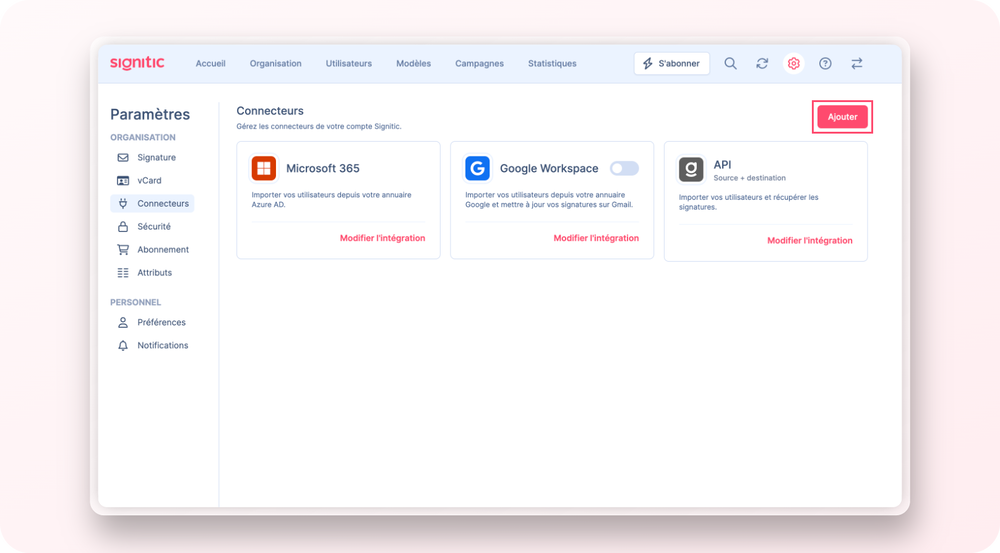
To link the two services, go to the Connectors page of your Signitic settings. Then click on add.
 Log in to your Salesforce admin account
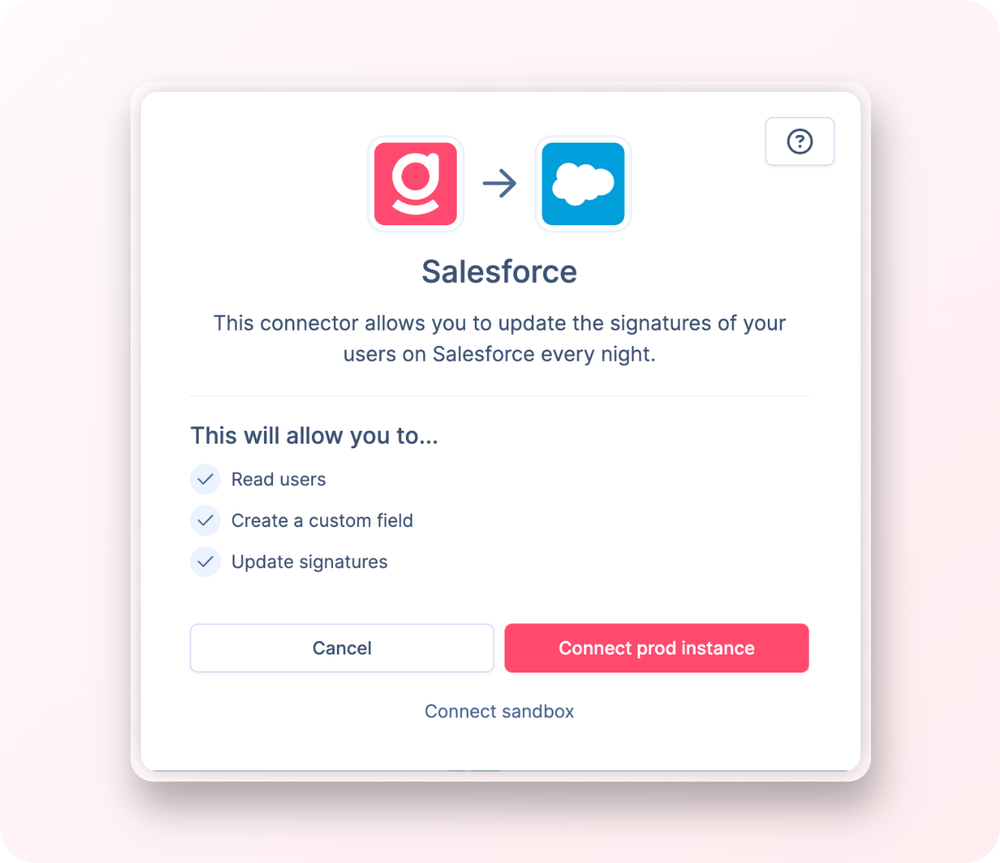
Select the Salesforce connector and click Connect.
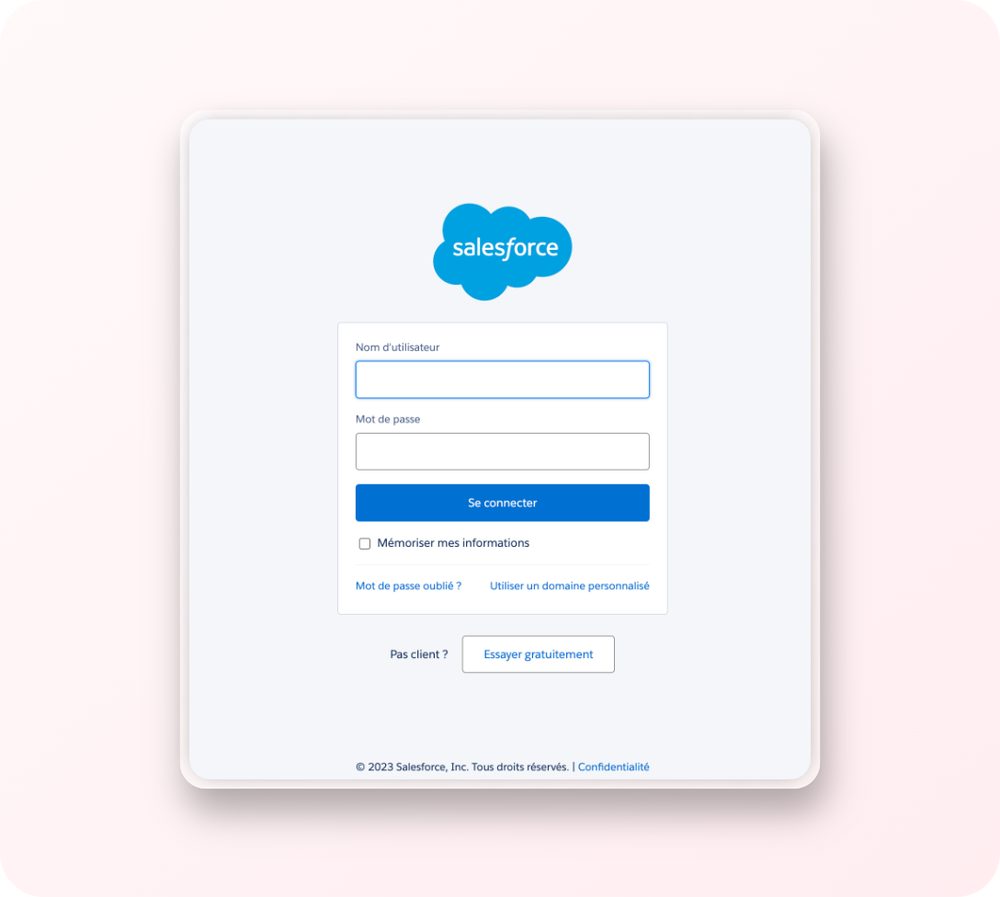
Log in with a Salesforce admin account.
Give Signitic permissions to access your API and you'll be back on Signitic.
 Enable signature update
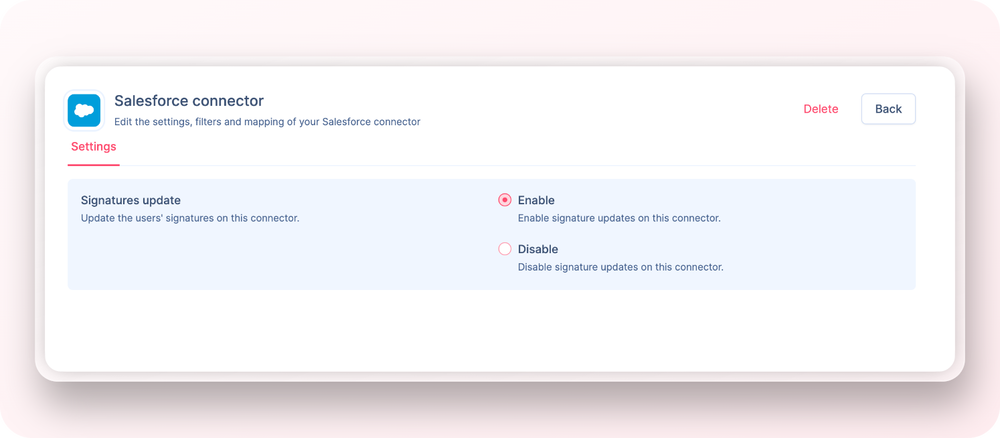
As with all Destination Connectors, it is important to enable signature updating on the connector afterwards if you want to update signatures straight away.
To do this, simply go back to the connectors settings and click on Salesforce integration. You will see the option to update signatures.
 Check user status
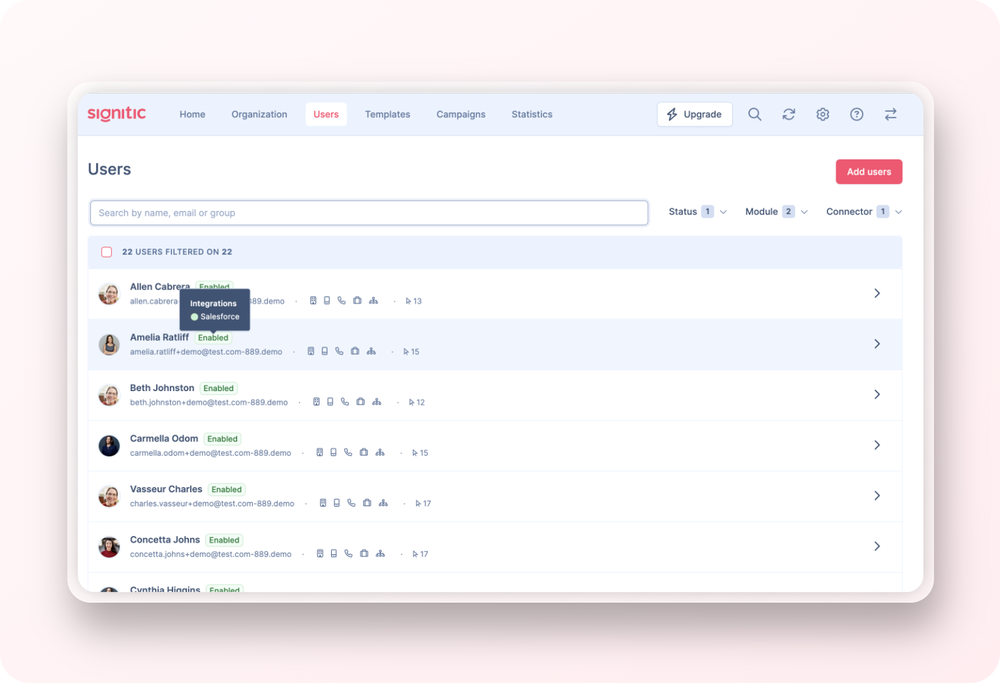
You can see if the Salesforce account is active by hovering over the user's status label.
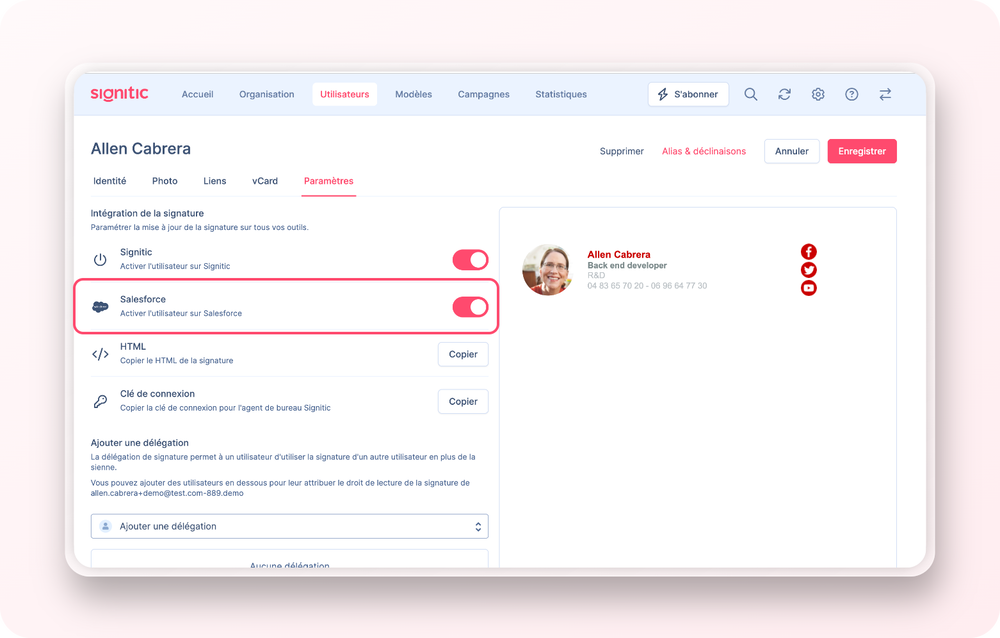
To change the status, go to the settings of the user record.
 Known issues :
On the latest versions of Salesforce, additional handling may be required.
 Go to Service Configuration
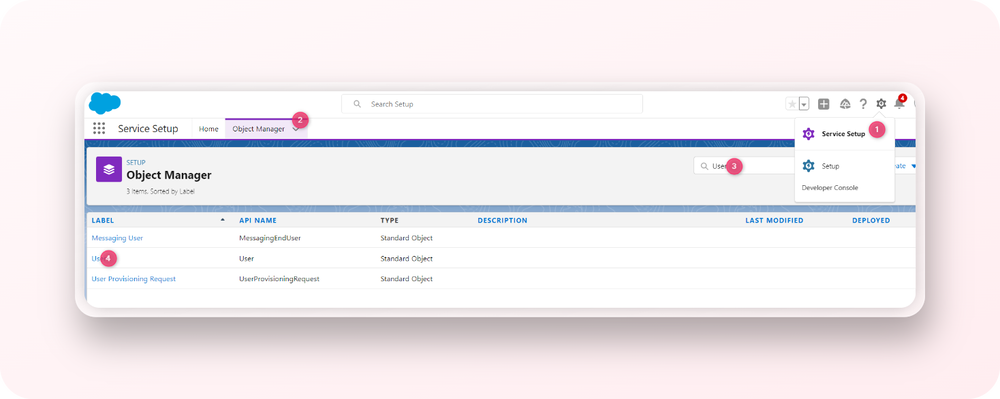
Go to your Service Setup (1) and then Object Manager (2).
Search (3) and click on User (4).
 Fields & Relationships
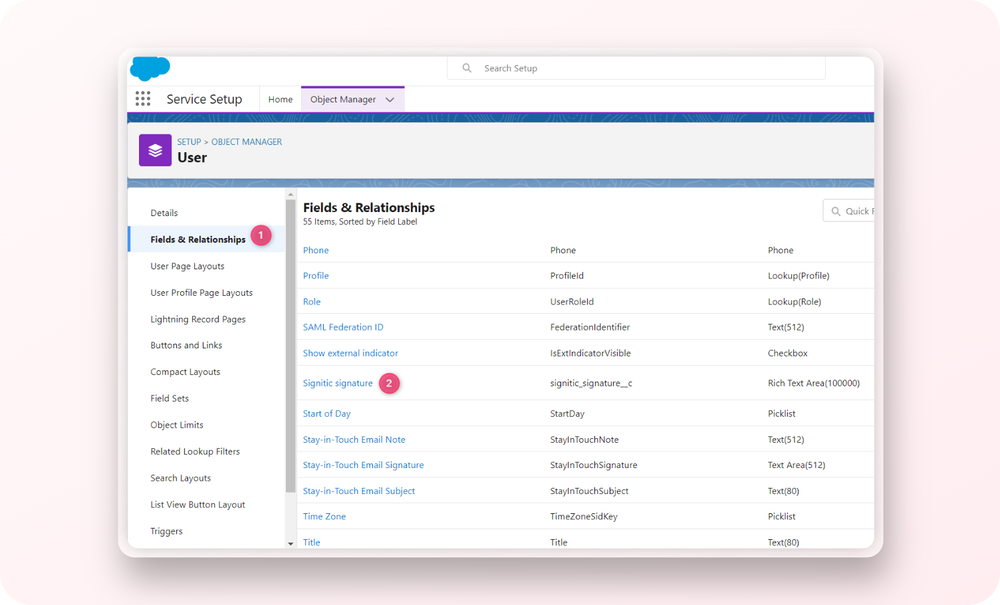
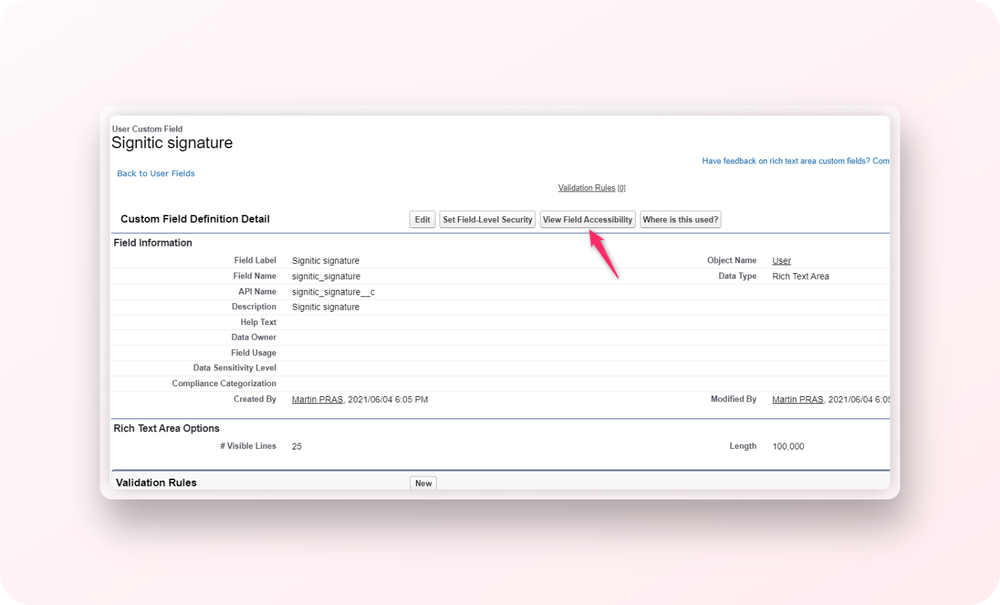
Then search for "signitic" under Fields and Relationships.
Once on the "signitic_signature" Custom Field page, click on View Field Accessibility:
In the next list, you have a list of your Salesforce roles and the field visibility type for that role.
It is necessary to make the standard users and the system administrators editable. To do this, just click on "Hidden" on the line of the corresponding role. Then check the following boxes:
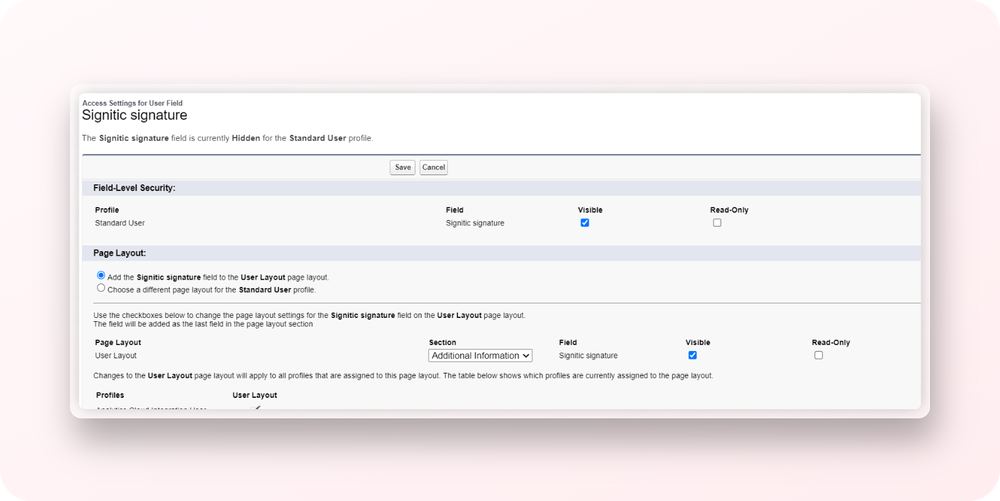
Once the change is made, the field is Editable.
 Be careful, you have to force the signature update again so that the signature appears for your Salesforce users. Either with the emergency console, or by waiting until the next morning.
You can check what the signature looks like on your User objects.